
A small space can hold a clear work area. You plan each tool so it sits near its use. In a tiny home, garage, or shed, you make a tight space work. Each word stays close to the next. This way, ideas and actions meet in short links that help you build your projects.
Why Build a Tiny Home Workshop?
A tiny home workshop has a clear job. It gives DIY fans a small place to work. It holds a spot for your art, crafts, or repair tasks. The space stays near you and helps you work with care and focus.
Key Features of an Effective Tiny Home Workshop
1. Smart Space Use
Each inch matters when space is low. Hang shelves on walls and clip hooks close to tools. Moveable work tables help you shift gears fast. Each tool sits near the work you do next.
2. Simple, Modular Layout
Break your space into small zones. Each zone holds one step of your task. A corner may hold cutting tools, another, assembly parts, and one more, finishing items. Small drawers and carts move with your plan. Each piece sits close to the next piece as you work.
3. Good Lighting
Bright work lights help your eyes. A window or a roof light brings sun close. Add a lamp that sits near your work. The light shines on your task so your hands can work with care.
4. Air and Climate Control
A small space needs fresh air. Fans and vents keep dust away. A small air unit or a fan blows cool air. Each breeze helps you work with ease and care.
Inspiring Tiny Home Workshop Ideas

1. Garage Workshop Change
A small garage turns into a work spot. Hang tools on the wall near each other. Use racks on the ceiling for big items. A table that folds keeps the space clear. The space stays free for your work without mixing with your living area.
2. Shed to Studio Space
A backyard shed becomes a small studio. Build the space with hard shelves and a small work table. A little desk sits near small tasks like paperwork or computer work. Light walls and a window make the room bright and warm.
3. One-Wall Workshop Setup
When space is very tight, use one wall. Clip hooks hold hand tools in a row. A magnetic strip keeps metal tools near each other. A small shelf rests next to each tool. Use a moveable table that tucks away when you are done.
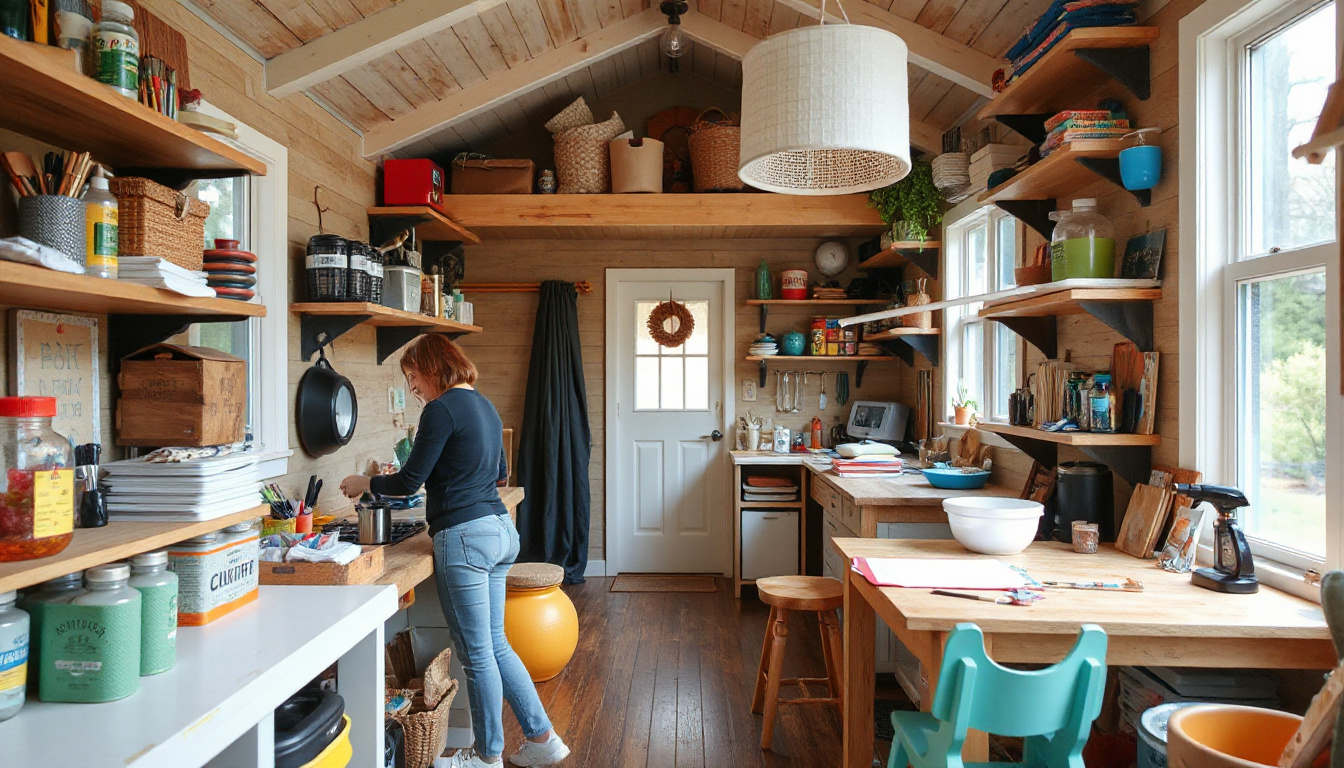
4. She Shed Workshop
A she shed workshop gives you a cozy space for craft work. The room holds soft lights and clear jars for bits and parts. A small table or a fold-away desk sits close by. This small room stays neat and true to your style.
Tools and Equipment Essentials for Tiny Workshops
• Compact power tools that work in more ways
• A foldable work table that holds your task
• Small storage boxes, bins, and holders
• Carts that move to bring tools close
• Lamps or mounted lights that sit above your work
• Wall pegboards and slat mounts for hanging items
Tips for Organizing and Maximizing Tiny Workshop Space
• Keep items low and in one spot to cut waste
• Label tools so each word links to its task
• Use high wall shelves and hooks that make floors clear
• Mark small zones for cutting, building, and finishing
• Bring moveable storage when work shifts from place to place
Inspiring Examples to Spark Your Imagination
• A 10’x16’ garage turned into a clear work zone, where each tool sits near its spot and the lights shine just above.
• A backyard studio shed that holds natural light and neat wall racks with a tiny desk for a clear plan.
• A one-wall setup where pegboards, magnetic strips, and a small moveable table build a neat row for work.
Conclusion
A small area can become a dependable workshop with a clear plan. Each tool sits near its use. Whether in a garage, a shed, or a small house corner, your space holds room for work. Arrange shelves, tables, and lights so each pair of words and tools connect. Your tiny workshop waits to help your DIY work grow.
Embrace the work—your ideal tiny workshop awaits!
Leave a Reply